EXCLUSIVE FORUM FOR MACHINE DISMANTLERS AND REPAIR PEOPLE > East Chicago
> Agricultural and Construiction
> Animal Feed
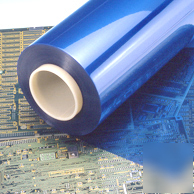
> Dry film photoresist roll + developer - copper clad pcb
Dry film photoresist roll + developer - copper clad pcb
1 x 5 foot roll of Riston Negative acting Dry Film Photoresist with Developer.
You can create incredibly fine, detailed PCB boards using this high quality DuPont Riston Photoresist. It is the same material that professional PCB shops use.
* Sodium Carbonate Developer.
* Guide to determine initial exposure time.
1. Prepare: Clean your board under running water with Ajax/Comet and nylon scrubber. Rinse well. Under incandescent or UV safe lighting, precut dry film a little larger than your board.
2. Apply Resist: Use two small pieces of scotch tape to remove release layer and apply resist to board.
A. Apply using a hot roll laminator, or...
B. Apply using the wet method. Pool some water on top of your board. Dip one end of film into the pool, slide it to the edge of the board and slowly lower into place. Use a rubber roller to remove excess water, working from the center outwards. Place board in 200 F (93 C) preheated oven for 15 minutes.
3. Expose: Place your negative artwork over resist. Use a pane of glass to press the artwork snuggly to the board, and expose to UV-A light source. (Fluorescent black light, Florescent UV bug zapper light, Blacklight Blue(BLB), etc.) Light source should be about 8-12" away from the board being exposed. Amount of time to expose depends on type of light used and intensity.
4. Develop: Let rest for 10 minutes, remove clear cover layer with a small piece of tape, and develop board in a mixture of around 1 cup warm water to 1/2 teaspoon developer (~1% by weight). After 3 minutes pull out of developer and hold under running water, you can rub with fingers, moist paper towel or sponge. Board can always be placed back in the developer if it needs more time. Carefully inspect in full light.
Tips to a perfect circuit board:
* Dark areas of your negative artwork should be completely black and block all light. Use the darkest setting on your printer. It is also possible to print two copies and double them up.
* A cheap alternative to printable overhead transparencies is Vellum or Tracing paper. They are easily printed on and virtually transparent to UV light.
* Choose a light source that will give short exposure times. Keeping the light a set distance from the board during exposure will give sharper more defined edges to traces and pads.
Laminate FR4 FR-4 Material Single Sided Double & Sided SS DS Press Prototyping Creating Making Traces n Mils Sheets Shts 1/2 1 2 3 oz ounce Printed Circuit Peel Transfer Liquid Photo Photolithography micro drill bits soldering station ultraviolet lithography Microchip PIC microcontroller Atmel ATMega ATTiny